PROCUREMENT GUIDES / 03
Coordinating Material Finishes Across a Residential Project
Carry appearance decisions from material selection into a clear, usable finish and sample register.
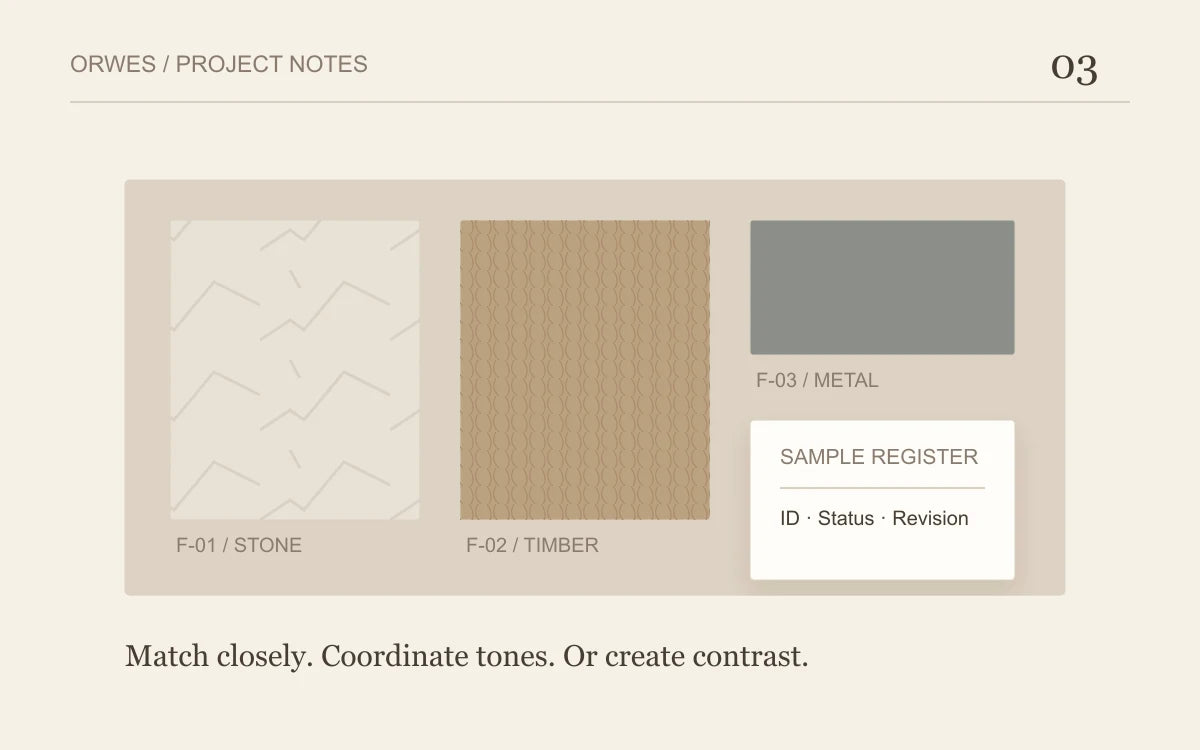
Coordinating material finishes starts with a clear record of what has been selected, where it will be used and which sample represents the agreed appearance. Colour names alone are rarely enough to communicate the full requirement.
For designers, builders and developers, the challenge often sits between individual selections. A finish may look appropriate on its own but need further review when placed beside other materials in the project.
A practical finish schedule helps the team carry design decisions through quotation comparison, sampling and purchasing.
1. Define the relationship between finishes
Begin by explaining the intended relationship between materials.
Some selections are intended to match closely. Others are meant to coordinate through similar tones or provide a deliberate contrast. These are different design instructions.
If every finish is simply described as “matching”, the recipient may not know which differences matter most.
Identify the features that are important to the design: colour, sheen, texture, pattern, edge appearance or another visible characteristic. Where a reference sample exists, give it a clear identifier.
This makes discussions more precise. Instead of asking whether an item “looks right”, the team can review it against the features that were actually selected.
2. Build one finish schedule
Use a central schedule to connect finish selections with material items and project locations.
Each finish should have a reference that is used consistently across drawings, material schedules and correspondence. If the same finish is used in several locations, link those locations to the same record rather than creating slightly different descriptions.
Useful fields include:
- Finish reference.
- Product or material reference.
- Location.
- Colour and surface description.
- Sample reference.
- Selection status.
- Person responsible for confirmation.
- Date and revision.
Keep proposed selections separate from confirmed selections. A finish being considered should not appear ready for purchasing unless that is the intended status.
3. Do not rely on colour names alone
Terms such as brushed, matt, warm white or bronze can describe a broad range of appearances. They are useful starting points, but they do not provide a complete visual reference.
Different base materials and surface treatments may also affect how a finish appears. A coating on metal and a decorative surface on a board should not be assumed to look identical because they share a colour name.
Photographs and digital references can help communicate direction. Their appearance can vary with lighting, photography and screen settings, so they should be used with that limitation in mind.
Where the relationship between finishes is important, review physical samples and record which ones have been selected.
4. Review samples together
Reviewing samples side by side can reveal differences that are less obvious when each is considered separately.
Include the materials that will be seen together in the finished space. Depending on the design, this may involve reviewing a fitting finish beside a tile, panel or other surface.
Use lighting conditions relevant to the project where practical. If the final lighting is not available, record the conditions used for the review and any further checks required.
Also consider how much of the finished appearance the sample represents. A small sample may help confirm colour or texture without showing the full effect of a larger patterned surface.
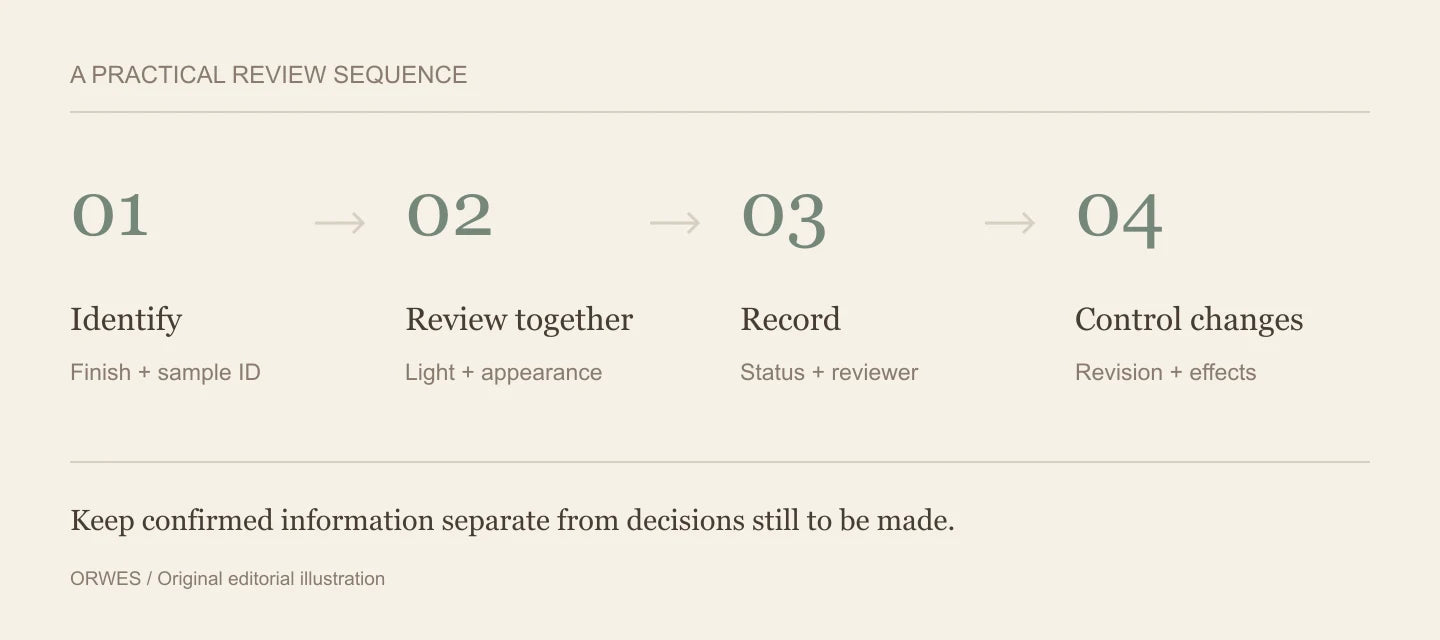
The review should produce a decision or a clear next step. Record whether the sample is accepted, rejected or awaiting further information.
When stone surfaces sit beside bathroom fittings, record which relationship matters: a close colour match, a compatible tone or a deliberate contrast. This describes the design intent without assuming that different materials will look identical.
5. Keep a clear sample record
Give each physical sample an identifier and connect it to the finish schedule.
Record who reviewed it, when it was reviewed and the scope of the decision. If approval relates to colour only, make that clear. It should not be treated as confirmation of dimensions, technical suitability or every other product requirement.
Where practical, retain an agreed reference sample and record where it is held. This gives the team a point of reference when questions arise later.
If several people hold samples, check that the identifiers refer to the same selection. Similar-looking samples without clear labels can create confusion during procurement.
6. Use a simple finish and sample register
The following fields can be used directly in a project spreadsheet or material schedule.
| Field | What to record |
|---|---|
| Finish ID | A unique reference used across project documents |
| Material or product | The item to which the finish applies |
| Location | Room, area, level or other project reference |
| Intended relationship | Close match, coordinated tone or deliberate contrast |
| Appearance | Colour, texture, sheen and other relevant features |
| Sample ID | Reference attached to the physical sample |
| Review status | Proposed, under review, confirmed or rejected |
| Review record | Reviewer, date and any conditions |
| Reference sample location | Where the agreed sample is held |
| Outstanding questions | Information or decisions still required |
| Revision | Current version and reason for change |
The register does not need to be elaborate. Its value comes from using it consistently and keeping the current decision visible.
7. Review changes before purchasing
A material substitution, revised finish or different product configuration may affect the intended relationship between selections.
As part of your pre-order review, identify the items affected by any proposed change and determine whether new samples or further review are needed. Update the schedule so the previous selection cannot be mistaken for the current one.
Avoid assuming that a finish decision automatically transfers to a different product or material.
Clear records help the design intent move beyond the initial selection. They give the wider project team a usable reference for what has been agreed and what remains open.
Include your finish schedule and sample references when you contact ORWES about your project. Clearly identifying the intended appearance provides a useful starting point for discussing the materials involved.